
There’s nothing quite like the magic of pulling a warm, crusty loaf of sourdough from your own oven. The amazing smell that fills your kitchen and the sound of the crust crackling as it cools is one of baking’s greatest rewards. It’s pure comfort and joy.
For a long time, many people thought this experience was off-limits if you couldn’t have gluten. It felt like a huge sacrifice to give up that tangy flavor and satisfyingly chewy crumb. But I’m so excited to tell you that you don’t have to miss out on amazing homemade bread!
After countless batches and a lot of passion, I finally perfected a method that works every single time. This is my unforgettable gluten free sourdough bread recipe, designed to be reliable, delicious, and deeply satisfying. It captures everything we love about traditional sourdough.
This recipe creates a beautiful loaf with that classic tangy flavor and a wonderful, soft texture, all without a speck of gluten. Whether you’re a seasoned baker or just starting your journey, you can absolutely make this. Let’s bake a loaf that will bring everyone to the table.
Table of Contents
What You’ll Need: Ingredients for Your Gluten Free Sourdough Bread
Let’s gather everything we need to make this delicious gluten free sourdough bread recipe. The list might seem a bit long, but each ingredient plays a crucial role in getting the perfect loaf. Using a digital kitchen scale is highly recommended for gluten-free baking, as it ensures you get the exact ratios needed for success.
Our flour blend uses a mix of whole grains and starches to create a balanced flavor and light, chewy texture. The real magic ingredient here is psyllium husk. It acts as a binder, creating a flexible dough and giving our bread that wonderful structure and chew that we’re looking for, all without gluten!
Preferment (The Night Before)
- 150g active gluten-free sourdough starter (at peak rise and super bubbly)
- 100g filtered water
- 80g superfine brown rice flour
Liquids
- 20g whole psyllium husk (or 16g psyllium husk powder, sifted to prevent clumps)
- 20g maple syrup or honey
- 300g filtered water (use 270g-290g if you’ve had gummy loaves before)
- 8g-15g olive oil (this is optional, but it helps create a softer crust)
Flour Mix
- 80g potato starch (make sure it’s starch, not potato flour!)
- 60g tapioca flour (or arrowroot flour)
- 80g sorghum flour
- 65g-80g superfine brown rice flour (use the higher amount if adding oil)
- 12g fine sea salt
Baking Bliss: Your Step-by-Step Gluten Free Sourdough Bread Recipe
Alright, this is where the fun really begins! Follow these steps closely, but don’t be afraid to trust your instincts. Baking is a sensory experience, so pay attention to how the dough looks and feels along the way. Let’s get our hands doughy!
Step 1: Make the Preferment
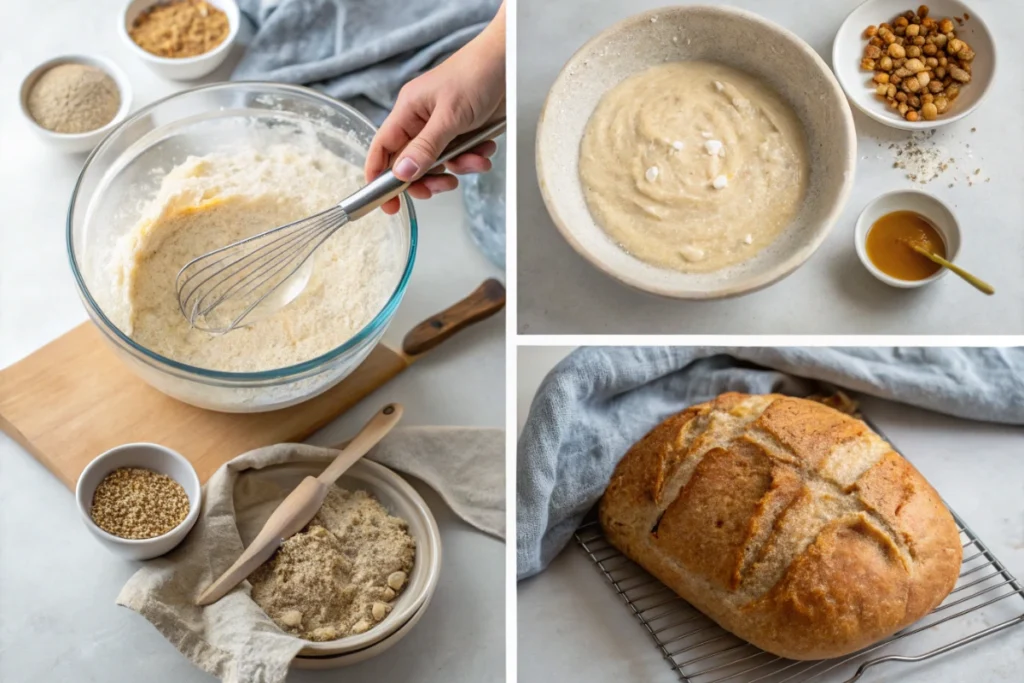
The night before you plan to bake, let’s kickstart the flavor. In a medium bowl, mix your active, bubbly gluten-free starter with the water and superfine brown rice flour. Stir until just combined, cover it loosely, and leave it on your counter for 8-12 hours. It should look noticeably puffier and full of bubbles by morning.
Step 2: Prepare the Main Dough – Liquids
In the large bowl of your stand mixer or another large mixing bowl, add the 300g of water, maple syrup, and olive oil (if using). Sprinkle the psyllium husk over the water and whisk it in quickly to prevent clumping. Let it sit for about 5-10 minutes. It will transform into a thick, gelatinous mixture. This gel is our secret weapon for structure!
Step 3: Combine the Dry Ingredients
While the psyllium gel is forming, grab a separate bowl. Add all the remaining dry ingredients from the “Flour Mix” list: potato starch, tapioca flour, sorghum flour, brown rice flour, and salt. Whisk them together thoroughly. This is important to make sure the salt is evenly distributed throughout the dough.
Step 4: Mix Everything Together
Add the bubbly preferment from the night before and the psyllium gel to your bowl of dry ingredients. If using a stand mixer, use the dough hook on low speed to combine everything until no dry flour remains. If mixing by hand, use a sturdy spatula. The dough will be very sticky and look a bit shaggy. Cover the bowl and let it rest for 30 minutes.
Step 5: The First Rise (Bulk Fermentation)
This is where the magic of fermentation happens. Keep the dough covered at room temperature and let it rise for 4-8 hours. The exact time will depend on the warmth of your kitchen. You’re looking for visual cues: the dough should look noticeably puffier, feel airy, and have a slight dome on top.
Step 6: Shaping Your Loaf
Lightly flour your work surface with brown rice flour. Gently scrape the dough out of the bowl. It will still be soft. With floured or wet hands, gently press the dough into a rough rectangle. Fold the sides in, then roll it up from the bottom to form a taut ball (a boule) or an oval (a batard). This shaping is a key step for a successful gluten free sourdough bread recipe.
Step 7: The Second Rise (Proofing)
Generously flour a proofing basket (banneton) or a bowl lined with a clean kitchen towel. Place your shaped loaf into the basket, seam-side up. You can let it proof on the counter for 1-2 hours until puffy, or for the best flavor, cover it and place it in the refrigerator for a cold proof for 8-24 hours.
Step 8: Prepare for Baking
Place a Dutch oven with its lid on in your oven. Preheat the oven to 450°F (232°C). Letting the pot get screaming hot is essential for that amazing oven spring and a crispy, golden crust.
Step 9: Scoring and Baking
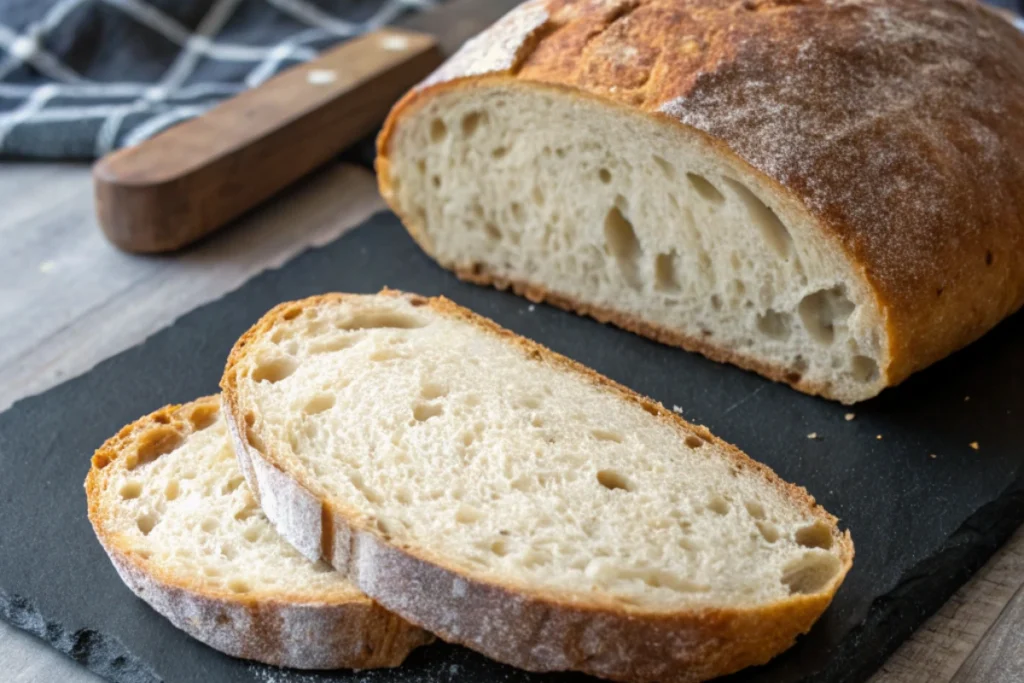
Carefully remove the hot Dutch oven from the oven. Gently turn your proofed loaf out of the basket and onto a piece of parchment paper, then lower it into the hot pot. Using a sharp knife or bread lame, make one decisive slash across the top, about ½ inch deep. Cover the pot, return it to the oven, and bake for 35 minutes. Then, remove the lid and bake for another 20-30 minutes, until the crust is a deep golden brown.
Step 10: The Hardest Part – Cooling!
This step is critical! Using oven mitts, carefully transfer your beautiful loaf to a wire rack. Now comes the ultimate test of patience: you must let it cool completely before slicing. I know it’s tempting, but waiting at least 4-6 hours (overnight is even better!) allows the internal crumb to set. Slicing it while it’s still warm will result in a gummy texture. Your patience will be rewarded.
Easy Recipe Variations and Customizations
Once you feel comfortable with this foundational gluten free sourdough bread recipe, the real fun begins! Think of this loaf as your delicious canvas. Customizing it with different flavors is a fantastic way to make this gluten free sourdough bread recipe completely your own. You can create a loaf for any occasion.
Here are a few of my favorite ideas to get you started:
- Sweet & Fruity: For a loaf that’s perfect for breakfast toast, try adding ¾ cup of dried cranberries and a teaspoon of orange zest. Or, mix in chopped apricots and walnuts for a classic combination.
- Savory & Herby: Create a savory loaf perfect for sandwiches or dipping in olive oil. Mix in a tablespoon of fresh chopped rosemary and a ½ cup of chopped kalamata olives. Sun-dried tomatoes and roasted garlic are also incredible additions.
- Nutty & Seedy: To add wonderful texture and flavor, try incorporating ½ cup of toasted seeds, like pumpkin or sunflower seeds, into your dough.
Gently fold your chosen additions into the dough right before you shape it in Step 6. Enjoy experimenting! If you’re looking for other baking projects, you might love my simple 4 ingredient banana bread healthy or this wonderfully moist Banana Bread with Olive Oil. And for more inspiration, you can see how other bakers approach their own gluten free sourdough bread recipe.
How to Serve and Store Your Masterpiece
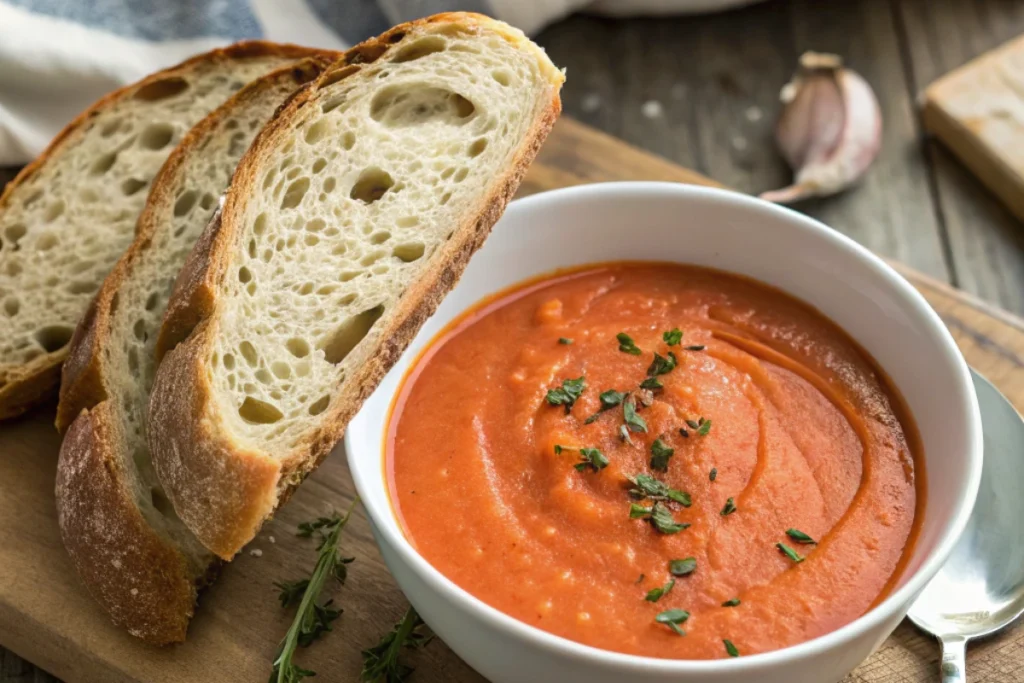
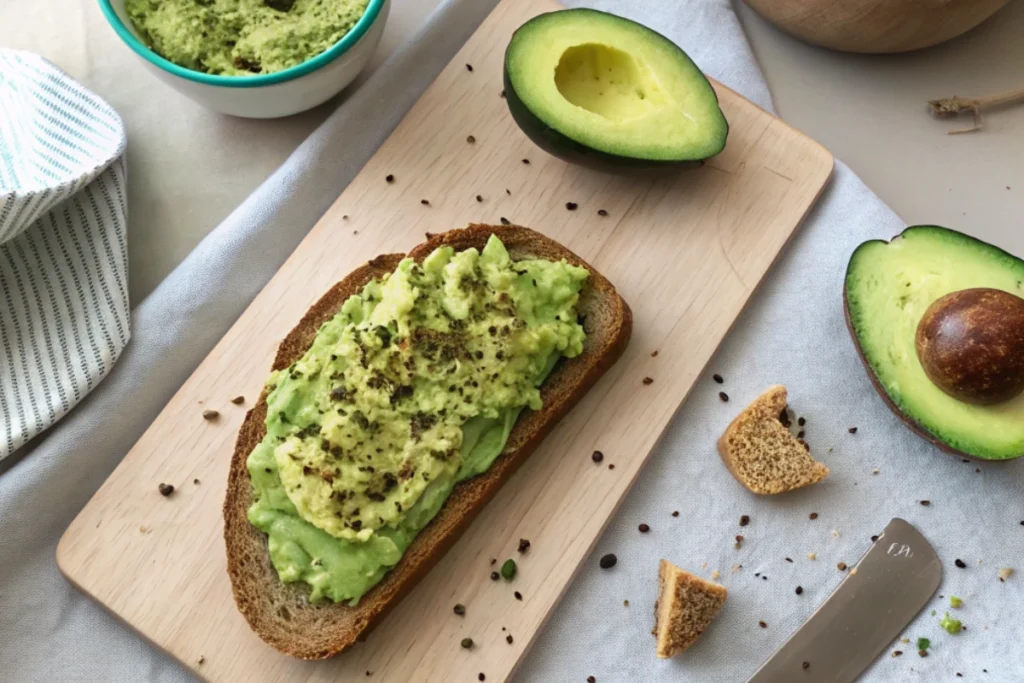
You did it! Now for the most rewarding part: enjoying the results of your gluten free sourdough bread recipe. A fresh slice of this bread is heavenly on its own or with a simple spread of good quality butter. It elevates avocado toast and makes for incredible, sturdy sandwiches that won’t fall apart. It’s also the perfect partner for a hearty bowl of soup.
To keep your bread fresh, store it for up to three days at room temperature. The best way is to place it cut-side down on a cutting board and cover it with a clean kitchen towel. This helps the crust stay crisp while keeping the crumb moist. Avoid plastic bags, as they can soften the crust.
This loaf also freezes wonderfully. I suggest slicing the entire loaf once it has cooled completely. Then, you can pop the slices into a freezer-safe bag and pull one out to toast whenever a craving strikes. It’s the perfect way to enjoy your hard work for weeks to come.
Frequently Asked Questions
Baking gluten-free sourdough can bring up a few questions, especially if you’re new to it. Here are answers to some of the most common ones I hear. I hope they help you feel confident as you start your baking adventure!
Is gluten-free sourdough bread possible?
Absolutely! While traditional sourdough relies on the gluten in wheat flour to create its structure, we can achieve a similar result using smart ingredients. It’s a different process, but the outcome is just as rewarding.
This gluten free sourdough bread recipe uses a binder like psyllium husk to create a flexible dough that can trap the gases from the wild yeast. This gives us a beautiful loaf with a soft, chewy texture, a lovely open crumb, and that classic tangy flavor we all love.
What type of gluten-free flour is best for sourdough?
The key to great texture and flavor is using a blend of flours, not just one. A single gluten-free flour often results in a loaf that is too dense or crumbly. A good mix creates balance.
My recipe uses whole-grain flours like brown rice and sorghum for their protein, structure, and earthy flavor. We then add starches like potato and tapioca to bring in lightness, airiness, and that wonderful chew. This balanced combination is what makes the best gluten free sourdough bread recipe.
What is the secret to gluten-free sourdough?
If I had to share my secrets, I’d say there are three main things:
A bubbly, active starter. Your starter is the engine of this recipe, so make sure it’s happy and at its peak when you use it.
The right binder. Psyllium husk is the magic ingredient that mimics gluten, providing the structure and flexibility the dough needs.
Patience! Gluten-free dough needs time. Don’t rush the fermentation, and most importantly, don’t slice the bread until it’s completely cool. Following the steps in this gluten free sourdough bread recipe carefully is the ultimate secret.
Is sourdough ok if you are gluten intolerant?
This is a very important question. Traditional sourdough made with wheat, rye, or barley is not safe for someone with celiac disease or a high gluten intolerance. While fermentation does break down some proteins, it does not remove enough gluten to be considered safe.
However, a loaf made using 100% certified gluten-free flours and a gluten-free starter is perfectly safe and delicious. This gluten free sourdough bread recipe is designed specifically for those who need to avoid gluten, so you can enjoy every last bite without worry.
Conclusion
Congratulations on making it to the end of this journey! Taking on the challenge of baking your own gluten-free sourdough is a huge accomplishment, and you should be incredibly proud of the beautiful loaf you’ve created.
Remember, baking is so much more than just following a recipe. It’s about creating something wonderful with your own hands, filling your home with incredible aromas, and sharing that warmth with the people you love. I truly hope this gluten free sourdough bread recipe brings as much happiness and deliciousness to your kitchen as it has to mine.
Print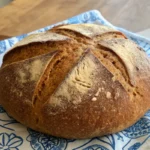
Gluten Free Sourdough Bread Recipe – The Best Step-by-Step Guide (2025)
- Total Time: 1 hour 25 minutes
- Yield: 1 sourdough 1x
- Diet: Gluten Free
Description
This unforgettable, reliable recipe creates a beautiful loaf of gluten free sourdough with a classic tangy flavor, a wonderful, soft texture, and a perfectly crusty exterior. Pure comfort!
Ingredients
For the Preferment (The Night Before):
150g active gluten-free sourdough starter
100g filtered water
80g superfine brown rice flour
For the Liquids:
20g whole psyllium husk (or 16g psyllium husk powder)
20g maple syrup or honey
300g filtered water
8g-15g olive oil (optional)
For the Flour Mix:
80g potato starch
60g tapioca flour
80g sorghum flour
65g-80g superfine brown rice flour
12g fine sea salt
Instructions
1. Make the Preferment: The night before baking, mix the starter, water, and brown rice flour. Cover loosely and leave on the counter for 8-12 hours until puffy and bubbly.
2. Prepare Liquids: In a large bowl, whisk together the 300g water, maple syrup, and optional olive oil. Sprinkle the psyllium husk over the top and whisk quickly. Let sit for 5-10 minutes to form a gel.
3. Combine Dry Ingredients: In a separate bowl, whisk together the potato starch, tapioca flour, sorghum flour, brown rice flour, and salt until thoroughly combined.
4. Mix Everything: Add the bubbly preferment and the psyllium gel to the dry ingredients. Mix with a stand mixer (dough hook) or by hand until no dry flour remains. The dough will be sticky. Cover and rest for 30 minutes.
5. First Rise (Bulk Fermentation): Keep the dough covered at room temperature for 4-8 hours, or until it looks puffier, feels airy, and has a slight dome on top.
6. Shape Your Loaf: On a lightly floured surface, gently press the dough into a rectangle. Fold the sides in, then roll it up to form a taut ball (boule) or oval (batard).
7. Second Rise (Proofing): Place the shaped loaf, seam-side up, into a generously floured proofing basket. Proof on the counter for 1-2 hours or in the refrigerator for a cold proof of 8-24 hours.
8. Prepare for Baking: Place a Dutch oven with its lid in your oven and preheat to 450°F (232°C).
9. Score and Bake: Carefully place the proofed loaf on parchment paper and lower it into the hot Dutch oven. Score the top with one ½-inch deep slash. Cover and bake for 35 minutes. Remove the lid and bake for another 20-30 minutes until deep golden brown.
10. Cool Completely: Transfer the loaf to a wire rack and let it cool completely before slicing, at least 4-6 hours. This is critical for the crumb to set properly.
Notes
The cooling step is mandatory; slicing warm bread will result in a gummy texture. Store the loaf cut-side down on a cutting board, covered with a kitchen towel, for up to 3 days. It also freezes well once sliced. For variations, try adding ¾ cup of dried fruit, a tablespoon of fresh herbs, or ½ cup of toasted nuts/seeds during the shaping step.
- Prep Time: 20 minutes
- Cook Time: 1 hour 05 minutes
- Category: Bread, Sourdough
- Method: Baking
- Cuisine: American
Nutrition
- Serving Size: 1 slice
- Calories: 155kcal
- Sugar: 1g
- Sodium: 383mg
- Fat: 2g
- Saturated Fat: 0.2g
- Carbohydrates: 33g
- Fiber: 3g
- Protein: 2g
- Cholesterol: 0mg
Keywords: gluten free sourdough, sourdough bread, gluten free bread, homemade sourdough, psyllium husk bread