Description
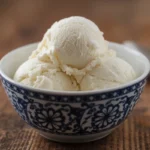
Make delicious coconut ice cream at home! This easy recipe guides you through creating creamy, dairy-free frozen dessert with simple steps and delightful variations.
Ingredients
1 1/2 cups full-fat canned coconut milk
1/2 cup additional coconut milk or milk of choice
1/3 cup sweetener of choice
1/8 teaspoon salt
1 1/2 teaspoons pure vanilla extract
Instructions
1. Prep Your Coconut Milk: Ensure you are using full-fat canned coconut milk, not the lighter versions or coconut milk beverage, as the fat content is crucial for a rich, creamy vegan ice cream. If your canned coconut milk has separated, simply warm the can in a bowl of hot water for a few minutes or gently stir it until it’s smooth and combined.
2. Combine Ingredients: In a medium-sized bowl, whisk together the 1 1/2 cups of full-fat canned coconut milk, the additional 1/2 cup of milk of choice, your chosen sweetener, salt, and vanilla extract. Stir well until the sweetener is completely dissolved. This forms the base of your delightful coconut ice cream.
3. Taste and Adjust: Give the mixture a little taste! This is your chance to adjust the sweetness or add a pinch more salt if desired. Remember, flavors can be a bit muted when frozen, so make it slightly sweeter than you’d prefer.
4. Chilling (Important Step!): For the best results, especially with an ice cream maker, chill your mixture thoroughly in the refrigerator for at least 4 hours, or even better, overnight. A well-chilled base helps your coconut ice cream freeze faster and creamier.
5. Ice Cream Maker Method: If you have an ice cream maker, pour the chilled mixture into your pre-chilled ice cream maker bowl. Churn according to your manufacturer’s directions. This usually takes 20-30 minutes until the coconut ice cream reaches a soft-serve consistency.
6. No-Churn Method (Without an Ice Cream Maker): For a no-churn coconut ice cream, pour the mixture into ice cube trays. Freeze for at least 4-6 hours, or until solid.
7. Blend (No-Churn Only): Once the coconut ice cubes are frozen, transfer them to a high-speed blender (like a Vitamix) or a powerful food processor. Blend until smooth and creamy, scraping down the sides as needed. You might need to add a tiny splash of extra coconut milk to get it moving, but use as little as possible to maintain a firm texture. This turns your frozen coconut milk into amazing no-churn coconut ice cream.
8. Serving Consistency: Either eat your homemade coconut ice cream straight from the machine or blender for a soft-serve texture, or transfer it to a freezer-safe container and freeze for another 2-4 hours for a firmer, scoopable consistency.
9. Enjoy Your Treat: When ready to serve, let your frozen coconut ice cream sit at room temperature for 5-10 minutes to soften slightly, making it easier to scoop.
Notes
You can customize the base with chocolate chips, mango puree, berries, toasted coconut, coffee, or nut butter. Use xylitol for a sugar-free version. This recipe is naturally dairy-free and vegan. Use parchment or plastic wrap on the surface during storage to avoid freezer burn.
- Prep Time: 15 minutes
- Category: Dessert
Keywords: coconut ice cream, homemade ice cream, dairy-free ice cream, vegan ice cream, no-churn ice cream, frozen dessert, coconut milk, tropical dessert, sweet treat, easy ice cream