There’s something truly magical about taking simple ingredients and turning them into a dessert that brings smiles and happy memories. From my earliest days in the kitchen, I’ve been fascinated by how a few basic items can transform into something incredibly special. It’s a joy I love to share with everyone, especially when it comes to sweet, cooling treats.
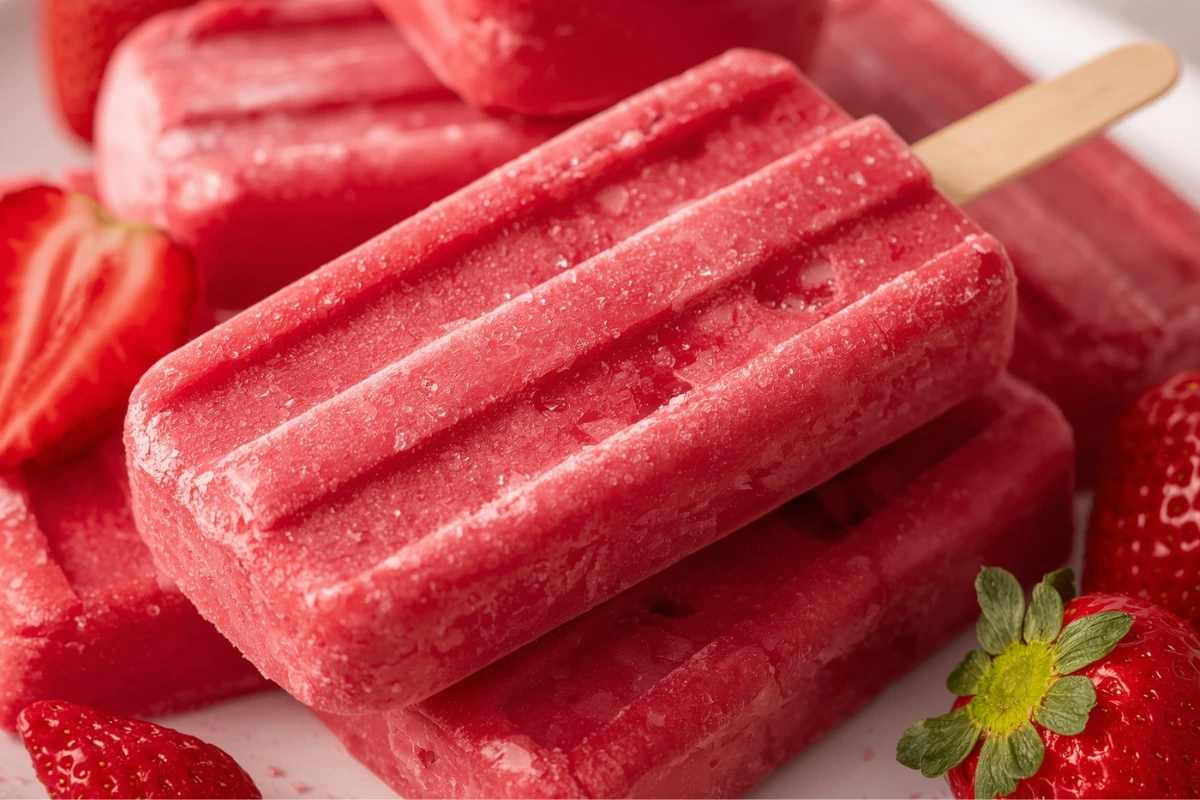
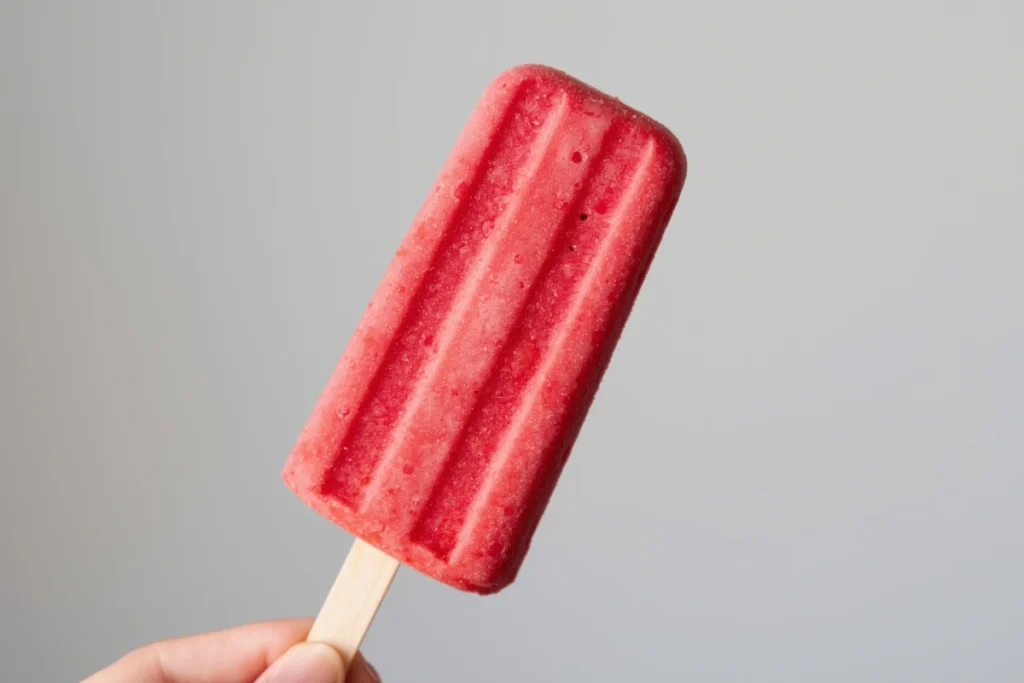
Today, I’m so excited to share one of my absolute favorite recipes: the easy homemade strawberry ice cream bar. This isn’t just a recipe; it’s a burst of pure sunshine on a stick! Imagine biting into a refreshingly sweet, icy pop that’s packed with real fruit flavor. It’s the perfect way to beat the heat on a warm afternoon and enjoy a truly delightful frozen treat.
What sets this recipe apart is just how easy it is to make. You only need a few natural ingredients to create these vibrant, healthy snacks. It’s a wonderful way to use fresh strawberries, turning them into a delicious dessert that both kids and adults will adore. Plus, making these healthy strawberry ice cream bars at home is a fun activity for the whole family! Get ready to make some sweet memories.
Table of Contents
Table of Contents
What You’ll Need: Ingredients for Amazing Strawberry Ice Cream Bars
Ready to make your own delicious strawberry ice cream bars? You’ll be shocked at how few ingredients it takes. These simple items will create the most refreshing frozen treats. Here’s what to grab:
- 1 lb fresh strawberries, hulled and quartered.
- ½ cup water (for a lighter bar, or use coconut water for a tropical twist, or milk/yogurt for creamier bars).
- 2-4 tablespoons granulated sugar or honey (adjust this to your taste, depending on how sweet your strawberries are).
- Optional: 1 teaspoon lemon juice (this really brightens the flavor of your strawberry ice cream bar!).
Baking Bliss: Step-by-Step Homemade Strawberry Ice Cream Bars
Alright, my friends, it’s time for the fun part! Making these homemade strawberry ice cream bars is so simple, you’ll wonder why you haven’t made them sooner. Get ready to create some absolutely delicious frozen treats with me. Just follow these easy steps, and you’ll be enjoying your refreshing creations in no time!
Here’s how to create your perfect frozen treats:
- Prepare the Strawberries: First things first, let’s get those beautiful strawberries ready. Gently wash them under cool water. Then, carefully remove the green tops, also known as hulling them. Once clean, cut your strawberries into quarters or even smaller pieces. This makes them much easier to blend smoothly and ensures your strawberry ice cream bar has a consistent texture.
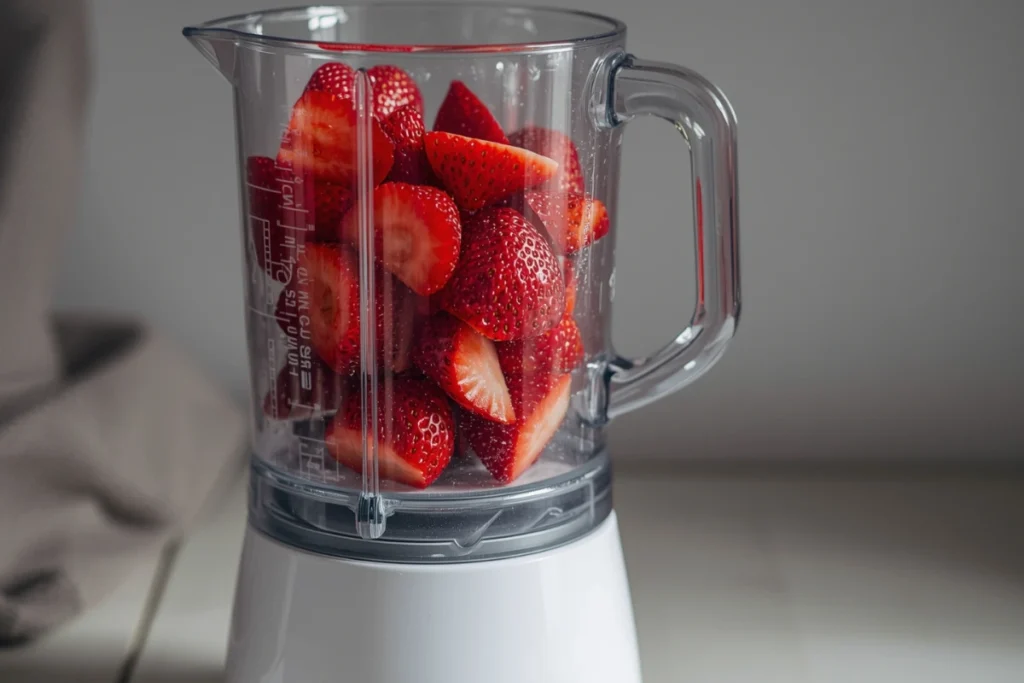
- Blend Away: Now, gather your prepared strawberries and toss them right into your blender. Add the ½ cup of water (or whatever liquid you chose for a creamier or more tropical vibe). Don’t forget to add your granulated sugar or honey, and if you’re using it, the little splash of lemon juice.
- Achieve Smoothness: Secure the lid on your blender and blend on high speed. You want to keep blending until the mixture is completely smooth and looks like a bright, uniform liquid. Make sure there are no large chunks of fruit left behind. For the ultimate smooth strawberry ice cream bar, you can even pour the mixture through a fine-mesh sieve. This step takes out any tiny seeds if you prefer a perfectly silky texture.
- Taste and Adjust: This is my favorite step because it’s all about getting the flavor just right for your strawberry ice cream bar! Take a small spoonful of the blended strawberry mixture and give it a taste. Do your strawberries need a little more sweetness? Add another tablespoon of sugar or honey. Want it a bit brighter? A tiny splash more lemon juice will do the trick. Remember, cold flavors can taste less sweet, so make it slightly sweeter than you think.
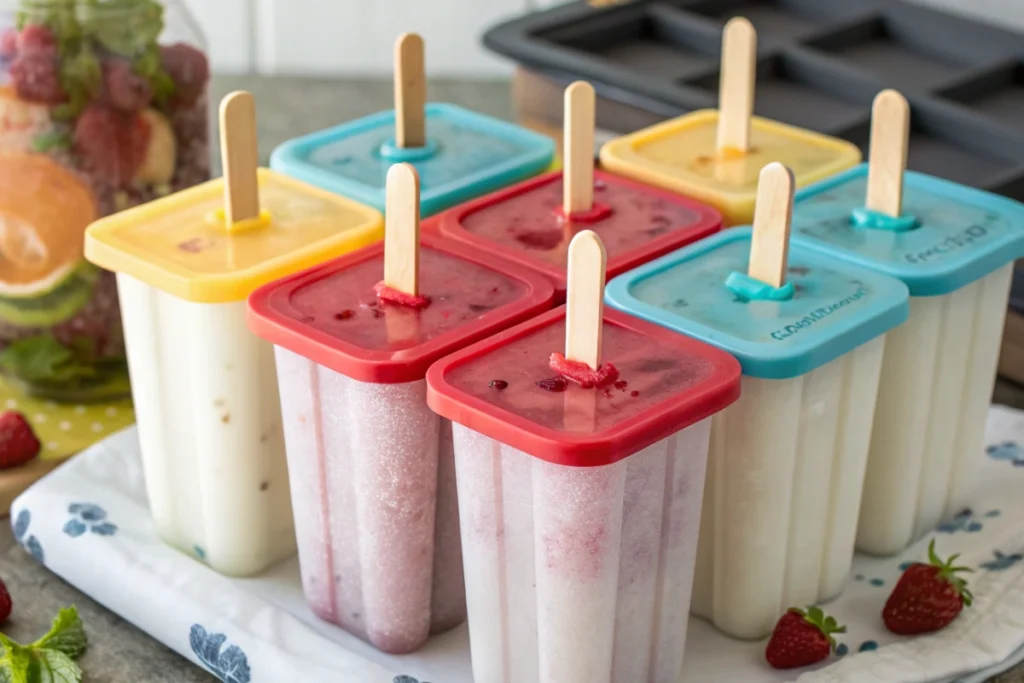
- Pour into Molds: Carefully grab your popsicle molds. Slowly pour the delicious strawberry mixture into each mold. Make sure to leave a little bit of space at the top, as liquids can expand slightly when they freeze. These molds are about to hold your future fantastic strawberry ice cream bars!
- Insert Sticks: If your popsicle molds have a slot for sticks, go ahead and insert a popsicle stick into the center of each filled mold. If your mold comes with a lid that has built-in reusable sticks, snap that lid securely into place. This keeps everything tidy and ready for freezing.
- Freeze Solid: This is where the magic happens and your liquid mixture transforms into solid, chilly treats! Carefully place the filled molds into your freezer. You’ll want to let them freeze for at least 4-6 hours. For the best results and to ensure your strawberry ice cream bars are completely solid and hold their shape perfectly, it’s even better to let them freeze overnight. Patience is key for these icy delights!
- Unmold with Care: When you’re ready to enjoy your homemade strawberry ice cream bar, it’s time to unmold them. This part can be tricky if you rush it, so be gentle! The easiest way is to run the outside of the mold under warm water for about 15-30 seconds. This gentle warmth helps to loosen the frozen bar from the mold, making it much easier to remove.
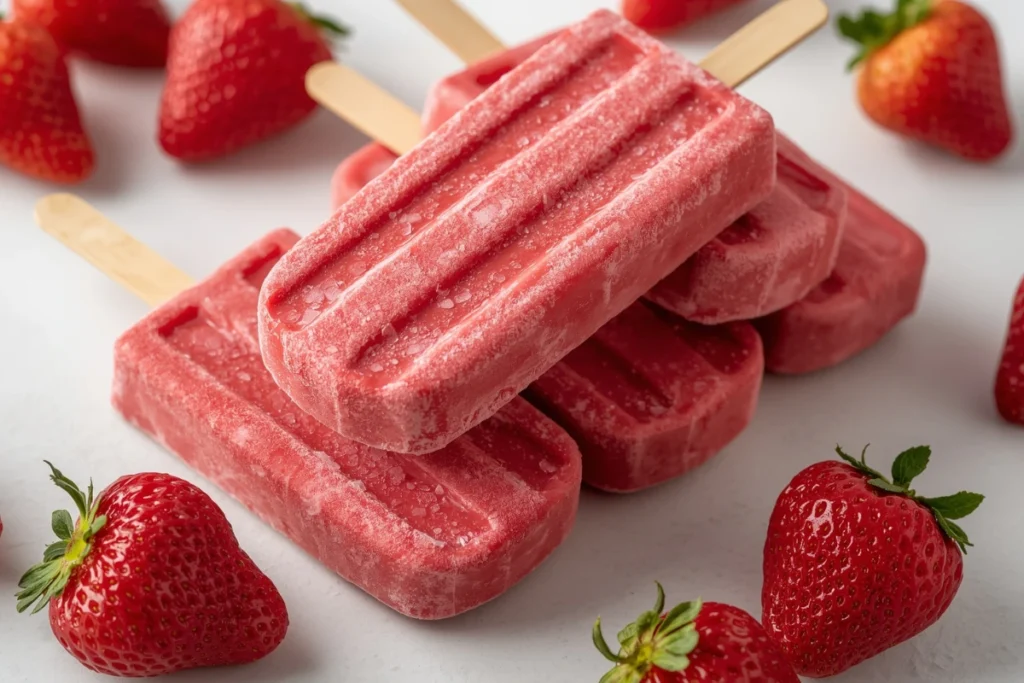
- Enjoy Your Creation: After that warm water bath, gently pull on the popsicle stick. Your beautiful, homemade strawberry ice cream bar should slide right out! Admire your handiwork – that vibrant red color and icy texture are a testament to your efforts.
- Serve & Share: The best part of making delicious treats is sharing them! Hand out these refreshing strawberry ice cream bars to your family and friends. Watch their faces light up with joy as they bite into a cool, fruity pop. There’s nothing quite like the satisfaction of sharing something you’ve made with love. Enjoy every single icy, sweet bite!
Chef’s Secrets for Perfect Strawberry Ice Cream Bars
Now that you know the steps, let me share a few of my personal chef’s secrets to make your homemade strawberry ice cream bars go from great to absolutely amazing! These little tricks will help you get the best flavor and texture every time, ensuring your frozen fruit bars are a huge hit.
- Choose Ripe Strawberries: This is probably the most important tip! The true star of your strawberry ice cream bar is, well, the strawberries! Make sure to pick ones that are bright red all over, smell wonderfully sweet, and feel firm but not hard. Super ripe strawberries mean maximum natural sweetness and flavor, so you might even need less added sugar.
- Adjust Sweetness Wisely: When you taste your blended mixture before freezing, remember that cold temperatures can make flavors taste less intense, especially sweetness. So, feel free to make your mixture taste a tiny bit sweeter than you think it needs to be. You can always add more sugar or honey, but you can’t take it away!
- For Creamier Bars: If you dream of a strawberry ice cream bar that feels more like a creamy dessert than a simple ice pop, here’s a trick! Instead of using all water, swap in some full-fat coconut milk, a dollop of Greek yogurt, or even a splash of heavy cream for a richer, more “ice cream bar” like texture. This adds a lovely richness and makes the texture incredibly smooth and satisfying. For another delicious creamy frozen treat, check out our recipe for homemade coconut ice cream.
- Prevent Freezer Burn: Once your beautiful strawberry ice cream bars are completely frozen and you’ve unmolded them, don’t just leave them out! Store them in an airtight container or wrap each one individually in plastic wrap or put them in freezer bags. This keeps them fresh and prevents those pesky ice crystals, ensuring your next strawberry ice cream bar is as perfect as the first.
- Quick Release is Key: Patience is a virtue when unmolding! If your strawberry ice cream bar is stuck, resist the urge to pull hard. Instead, run the mold under warm (not hot!) water for 15-30 seconds. This gentle warmth helps the frozen treat release easily, so it comes out perfectly formed and ready to enjoy.
Recipe Variations: Endless Strawberry Ice Cream Bar Possibilities
The beauty of a simple recipe like our homemade strawberry ice cream bar is how easily you can make it your own! Think of this as your canvas, and let your creativity shine. Here are some fun and delicious ways to play with the recipe and create exciting new frozen treats.
- Creamy Dreamy: Want your strawberry ice cream bar to feel more like actual ice cream? Blend in about ½ cup of full-fat Greek yogurt, thick coconut cream, or even a ripe banana for a super creamy, smoothie-like strawberry ice cream bar. This adds a lovely smooth texture.
- Berry Medley Magic: Why stop at just strawberries? Feel free to mix and match! Add a handful of other colorful berries like blueberries, raspberries, or blackberries into the blender. This creates a vibrant mixed berry ice cream bar that’s bursting with different flavors and even more antioxidants.
- Tropical Twist: Give your strawberry ice cream bar an exotic vacation feel! Instead of water, use pineapple juice, or blend in a few chunks of ripe mango or a slice of kiwi. These tropical fruits pair wonderfully with strawberries and add a refreshing, zesty kick to your frozen treat. If you’re looking for more tropical flavors, our pineapple coconut ice cream is another must-try.
- Chocolate Drizzle Delight: For those who love a classic combination, this one’s for you! Once your strawberry ice cream bars are completely frozen and ready to eat, melt some dark or white chocolate chips. Drizzle the melted chocolate over the bars, then quickly pop them back in the freezer for a minute to set. Hello, chocolate-covered strawberry ice cream bar!
- A Hint of Herb: For an unexpected and sophisticated twist, try blending in a few fresh herb leaves. A couple of mint leaves will add a cool, refreshing zing, or a tiny bit of fresh basil can offer a surprisingly delightful aromatic note to your strawberry ice cream bar. Just a small amount is all you need to elevate the flavor!
A Sweet Summer Memory: My First Strawberry Ice Cream Bar
Every time I make these strawberry ice cream bars, I’m instantly transported back to my grandmother’s kitchen. It was a sweltering summer day, the kind where the air felt thick and still. I was probably about five years old, barely tall enough to see over her old wooden counter. Grandma, with flour dusting her apron, decided it was a day for homemade popsicles.
She had a big bowl of freshly picked strawberries from her garden, bright red and smelling of sunshine. We washed them, and she let me mash some with a fork – a truly messy, joyful task for a little chef-in-training! We blended them with just a little water and a sprinkle of sugar, then poured the bright pink liquid into her old-fashioned metal popsicle mold. The anticipation as they froze was almost unbearable.
Finally, after what felt like an eternity, she pulled the mold from the freezer. We ran it under warm water, and then, with a gentle tug, out popped the most beautiful, icy red treat I had ever seen. That first bite of a homemade strawberry ice cream bar was pure magic – so cold, so sweet, and bursting with fresh berry flavor. It wasn’t just a dessert; it was a moment of pure, simple happiness. That day, that simple act of creating a delicious frozen bar, sparked something in me. It showed me how food, even a basic strawberry ice cream bar, can create lasting memories and bring people together, one sweet bite at a time.
Frequently Asked Questions (FAQ)
What is an ice cream bar called?
That’s a great question, because these frozen treats have many names! Depending on what they’re made of, you might hear them called a “popsicle,” “ice pop,” or “frozen fruit bar.” If it’s a frozen dessert made with dairy and on a stick, it’s often called an “ice cream bar.” Our delightful homemade strawberry ice cream bar fits perfectly into the “frozen fruit bar” category, but it’s just as satisfying as any ice cream treat!
How many calories are in a strawberry ice cream?
The number of calories in a strawberry ice cream bar can change a lot! It really depends on what ingredients are used. Store-bought versions often have more added sugar and fats from cream. Our homemade strawberry ice cream bar, made with fresh fruit, a little water, and just enough sweetener, is typically much lower in calories. You can expect a homemade one to be anywhere from 50 to 150 calories, making it a lighter, refreshing choice.
What is strawberry ice cream called?
Most often, it’s simply called “strawberry ice cream.” It’s one of the most classic and beloved ice cream flavors out there! When this delicious flavor is put onto a stick for easy eating, it then becomes known as a “strawberry ice cream bar” or sometimes a “strawberry ice pop.” No matter what you call it, it’s a bright, fruity, and refreshing treat that almost everyone loves! For another perspective on creating these delightful frozen treats, you can find a great strawberry ice cream bar recipe here.
What goes in strawberry ice cream?
Traditional strawberry ice cream usually contains a blend of dairy, like heavy cream and milk, along with sugar, fresh or pureed strawberries, and often a touch of vanilla extract. However, for our simple and refreshing homemade strawberry ice cream bar, the ingredients are much lighter! We focus on the pure goodness of fresh strawberries, a little water, and just enough sweetener to bring out their natural taste. This makes it a fruit-focused, lighter, and very healthy version of a frozen dessert. It’s the perfect base for a healthy strawberry ice cream bar.
Conclusion: Sweet Endings with Homemade Strawberry Ice Cream Bars
And there you have it, friends! You’ve just learned how to create a truly delightful and incredibly refreshing homemade strawberry ice cream bar. There’s a special kind of joy that comes from making something delicious with your own hands, especially when it’s a treat that brings so much happiness.
I truly encourage you to give this recipe a try. Don’t be afraid to experiment with the variations we talked about, or even create your own unique twist. Remember, baking (or in this case, “freezing”!) is all about sharing love and creating wonderful moments together. There’s nothing quite like biting into a cold, sweet, homemade strawberry ice cream bar on a warm day. Enjoy every delicious, icy bite!
Print
Strawberry Ice Cream Bar
- Total Time: 3 hour 15 minutes
- Yield: 8 bars
Description
This easy homemade strawberry ice cream bar recipe brings pure joy. Enjoy fresh fruit in a healthy, refreshing dessert perfect for family fun.
Ingredients
- 1 lb fresh strawberries, hulled and quartered
- 1/2 cup water (or coconut water, milk, or yogurt for variations)
- 2–4 tablespoons granulated sugar or honey
- 1 teaspoon lemon juice (optional)
Instructions
1. Prepare the Strawberries: Gently wash and hull your fresh strawberries. Cut them into quarters or smaller pieces so they’re easier to blend. This helps get that smooth texture for your strawberry ice cream bar.
2. Blend Away: Place the prepared strawberries, water (or your chosen liquid), and sugar/honey into a blender. If using lemon juice, add it now too.
3. Achieve Smoothness: Secure the lid on your blender and blend on high speed. You want to keep blending until the mixture is completely smooth and looks like a bright, uniform liquid. Make sure there are no large chunks of fruit left behind. For the ultimate smooth strawberry ice cream bar, you can even pour the mixture through a fine-mesh sieve. This step takes out any tiny seeds if you prefer a perfectly silky texture.
4. Taste and Adjust: This is my favorite step because it’s all about getting the flavor just right for your strawberry ice cream bar! Take a small spoonful of the blended strawberry mixture and give it a taste. Do your strawberries need a little more sweetness? Add another tablespoon of sugar or honey. Want it a bit brighter? A tiny splash more lemon juice will do the trick. Remember, cold flavors can taste less sweet, so make it slightly sweeter than you think.
5. Pour into Molds: Carefully grab your popsicle molds. Slowly pour the delicious strawberry mixture into each mold. Make sure to leave a little bit of space at the top, as liquids can expand slightly when they freeze. These molds are about to hold your future fantastic strawberry ice cream bars!
6. Insert Sticks: If your popsicle molds have a slot for sticks, go ahead and insert a popsicle stick into the center of each filled mold. If your mold comes with a lid that has built-in reusable sticks, snap that lid securely into place. This keeps everything tidy and ready for freezing.
7. Freeze Solid: Carefully place the filled molds into your freezer. You’ll want to let them freeze for at least 4-6 hours. For the best results and to ensure your strawberry ice cream bars are completely solid and hold their shape perfectly, it’s even better to let them freeze overnight. Patience is key for these icy delights!
8. Unmold with Care: When you’re ready to enjoy your homemade strawberry ice cream bar, it’s time to unmold them. This part can be tricky if you rush it, so be gentle! The easiest way is to run the outside of the mold under warm water for about 15-30 seconds. This gentle warmth helps to loosen the frozen bar from the mold, making it much easier to remove.
9. Enjoy Your Creation: After that warm water bath, gently pull on the popsicle stick. Your beautiful, homemade strawberry ice cream bar should slide right out! Admire your handiwork – that vibrant red color and icy texture are a testament to your efforts.
10. Serve & Share: The best part of making delicious treats is sharing them! Hand out these refreshing strawberry ice cream bars to your family and friends. Watch their faces light up with joy as they bite into a cool, fruity pop. There’s nothing quite like the satisfaction of sharing something you’ve made with love. Enjoy every single icy, sweet bite!
Notes
Variations include adding Greek yogurt, coconut cream, or banana for creaminess; mixing in other berries for a berry medley; using tropical fruits like mango or pineapple; drizzling with chocolate; or adding herbs like mint or basil for a unique flavor twist. Store frozen bars in airtight containers or wrap individually to prevent freezer burn.
- Prep Time: 15 minutes
- Cook Time: 3 hour